blog

Welcome to our blog! Discover the world of dry lining with Northfield Contracts Ltd., your trusted provider of dry lining services in Berwick-upon-Tweed, North Northumberland, and the Scottish Borders.

A Complete Guide to Dry Lining

07.12.2024

Introduction

Offering dry lining services in Berwick-upon-Tweed, North Northumberland, and the Scottish Borders, Northfield Contracts Ltd. welcome you to A Complete Guide to Dry Lining, where modern construction techniques meet expert craftsmanship. Discover how dry lining can transform any space into a sleek, modern interior, seamlessly blending style with functionality.

In this guide, we delve into the methods, materials, and benefits of dry lining, showing how it can elevate your home or project to new heights. Whether you’re a homeowner, builder, or renovator, our expertise ensures every project is completed to the highest standards of quality and excellence. Join us as we explore the transformative potential of dry lining and why it’s the perfect choice for creating exceptional interiors.
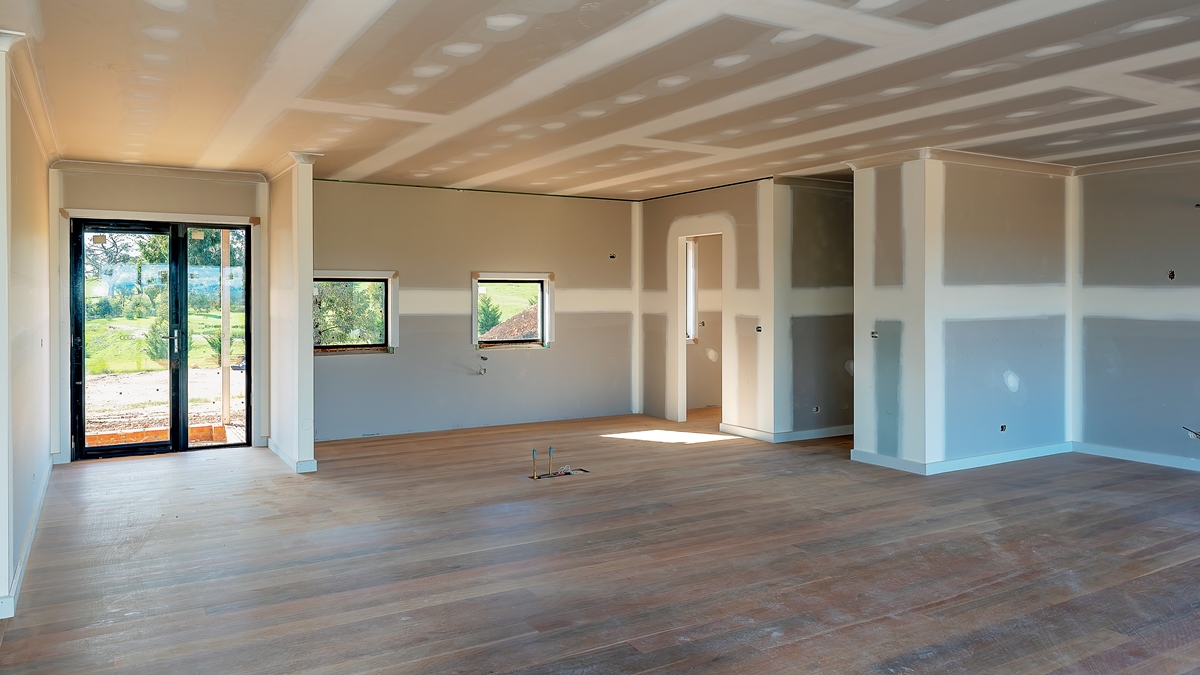
Interior of a new construction with unfinished dry lining, showing plasterboard walls and ceiling with visible joints and screw marks, ready for finishing.
An interior view of a newly constructed space featuring expertly installed dry lining, ready for the finishing touches.

History and Evolution of Dry Lining

Dry lining, also known as drywalling or plasterboarding, has its roots in early 20th-century construction. The introduction of gypsum plasterboard revolutionised the building industry by providing a faster, more efficient alternative to traditional lath and plaster techniques. This breakthrough allowed builders to achieve smoother finishes, reduce construction times, and improve overall building performance.

Over the years, dry lining has continually evolved, incorporating advanced materials like fire-resistant boards, enhanced insulation, and moisture-resistant finishes. These developments have made dry lining a flexible and functional solution for both residential and commercial projects, cementing its role in modern construction. Today, it remains a preferred choice for its ability to adapt to changing needs while delivering exceptional results.

Having explored its history and evolution, we now turn to the practical applications of dry lining in different environments.

Applications of Dry Lining

Dry lining has become an indispensable part of modern construction due to its adaptability and practicality. By offering tailored solutions for residential, commercial, and industrial projects, it caters to a wide range of construction needs. Its ability to create smooth, functional surfaces combined with enhanced thermal and acoustic properties makes it a preferred choice for diverse environments. From improving energy efficiency in homes to optimising layouts in offices and addressing the unique demands of industrial facilities, dry lining provides unmatched versatility. This versatility is evident across a range of settings, as shown in the examples below:

Residential Spaces:
  • Creates smooth, insulated surfaces ready for immediate decoration.
  • Ideal for both new builds and renovation projects.
  • Enhances energy efficiency and comfort.
Commercial Environments:
  • Enables adaptable partitions to optimise layouts.
  • Meets fire safety and acoustic performance standards.
  • Provides a professional finish for offices, retail spaces, and public buildings.
Industrial Settings:
  • Delivers advanced insulation for temperature regulation.
  • Enhances soundproofing for noise control in factories and warehouses.
  • Ensures durability in demanding environments.
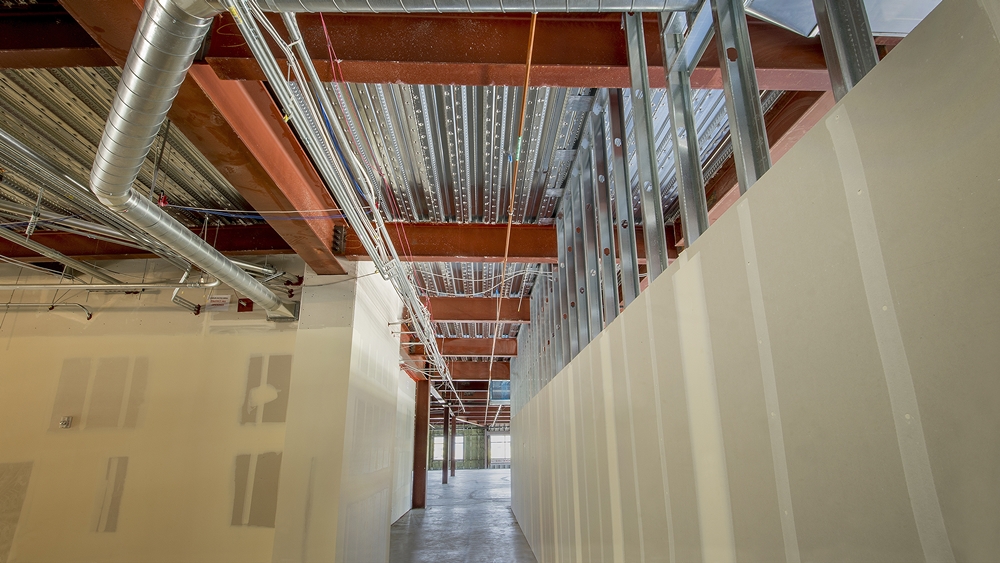
Interior of an office building under construction with drywall plasterboard installed on a metal frame system.
An office building under construction featuring steel framing and drywall plasterboard installation on a metal frame system.

Key Installation Methods for Dry Lining

Dry lining encompasses a range of techniques, each tailored to meet specific construction needs and preferences. Let’s explore some of the most commonly used methods in the industry, highlighting their unique advantages and potential drawbacks:

Direct Bond (Dot and Dab)

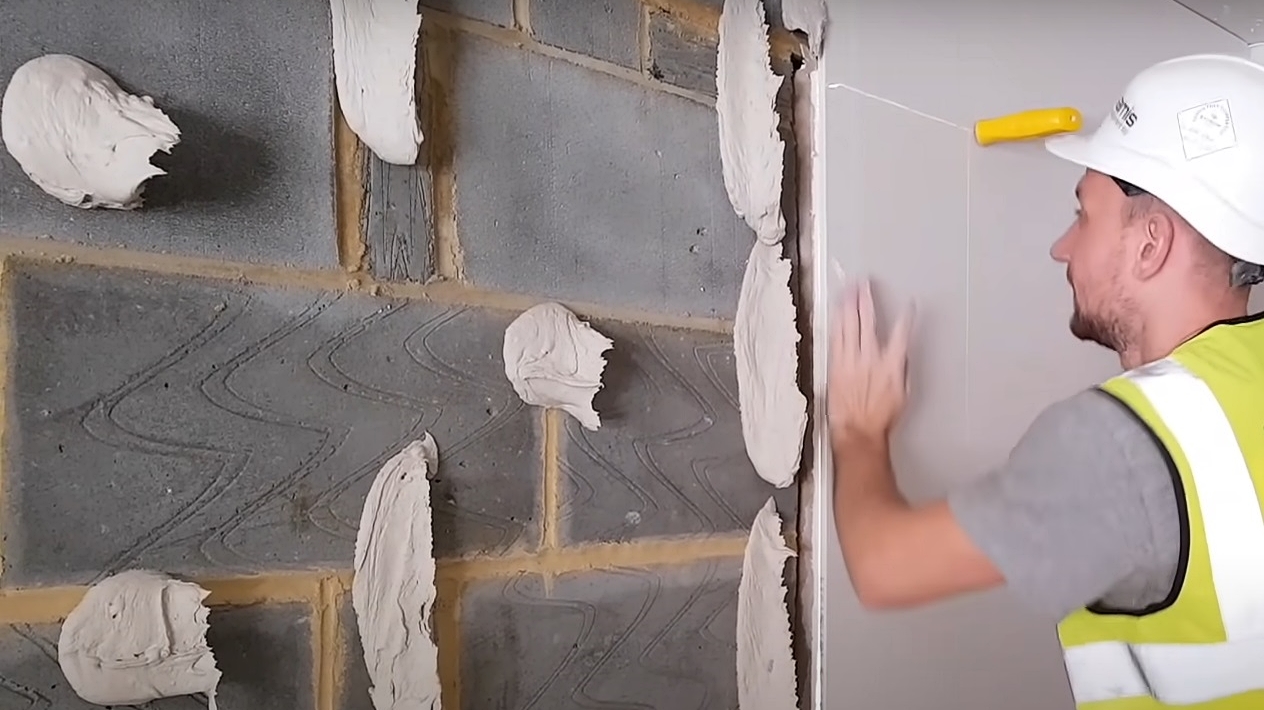
The Direct Bond method, often referred to as “Dot and Dab,” is a popular choice for its simplicity and speed. It involves applying adhesive dabs directly to the masonry or other wall surfaces and then pressing plasterboard panels against them. This method is particularly useful for quickly covering existing walls and is ideal for renovation projects where old walls need to be smoothed out without extensive demolition or construction.

Worker Installing Plasterboard Using the Dot and Dab Method
A construction worker applies plasterboard using the dot and dab method, preparing the wall for final finishing.
Advantages:
  • Quick and easy to install, ideal for fast projects
  • Provides basic thermal and acoustic insulation
  • Ideal for smoothing out walls with minimal work
Disadvantages:
  • Limited load-bearing capacity, not suitable for heavy fixtures
  • Adhesive may weaken in damp conditions
  • Inconsistent application can lead to uneven surfaces
Metal Frame Systems

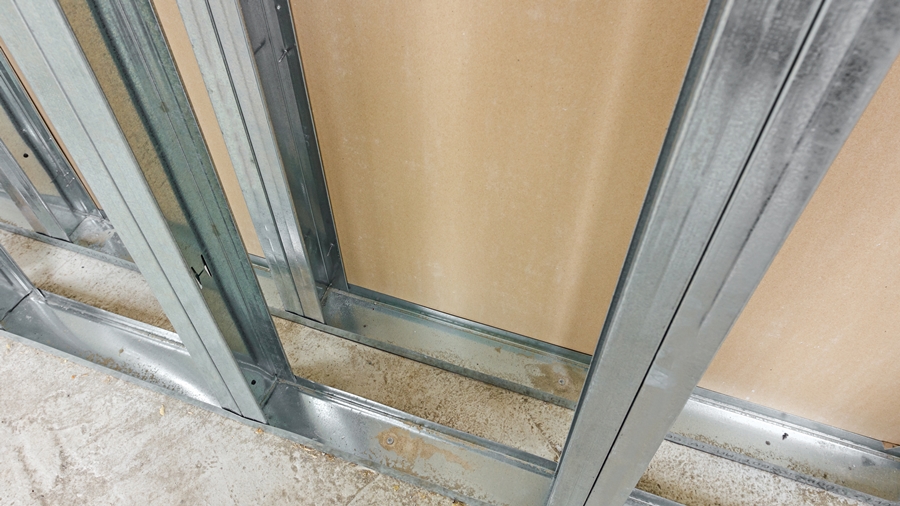
Metal frame systems involve constructing a metal framework to which plasterboard is attached. This method is highly versatile and can be used to create partitions, ceilings, and other architectural features.

Close-Up of Metal Frame System for Plasterboard Installation
A close-up view of a metal frame system, showcasing the foundation for plasterboard installation in a modern construction project.
Advantages:
  • Durable and resistant to fire and moisture
  • Provides excellent support for heavy finishes like tiles
  • Can be easily integrated with advanced insulation materials
Disadvantages:
  • Higher cost compared to timber frames
  • Requires precise installation to ensure stability
Timber Frame Systems

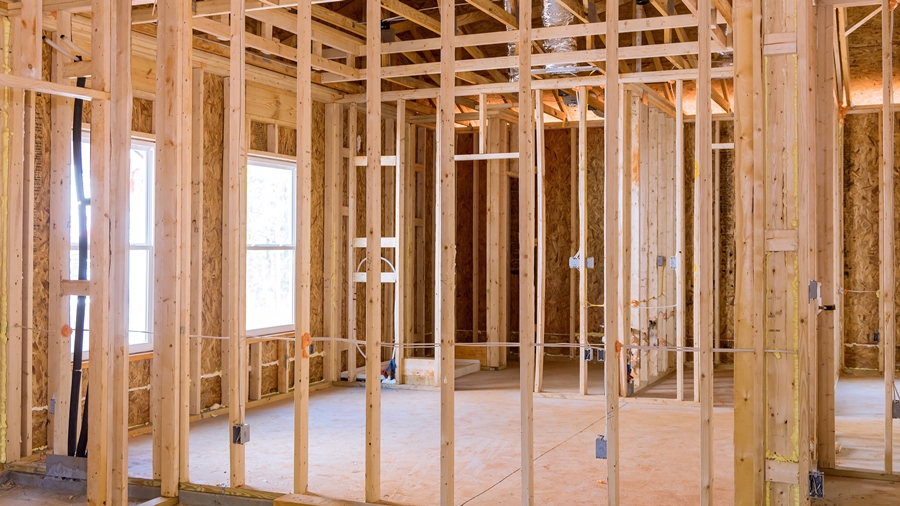
Timber frame systems work similarly to metal frame systems but use wooden studs instead of metal. This method is often preferred in residential construction due to its cost-effectiveness and ease of handling.

An interior timber frame construction, ready for drywall plasterboard installation.
Interior timber frame construction system prepared for the next phase of building with drywall plasterboard installation.
Advantages:
  • Cost-effective and easy to handle, popular in residential projects
  • Provides flexibility in design and construction
  • Easy to modify or cut on-site
Disadvantages:
  • Less resistant to moisture and fire than metal frames
  • Can be susceptible to warping and rot
Insulated Wall Lining Systems

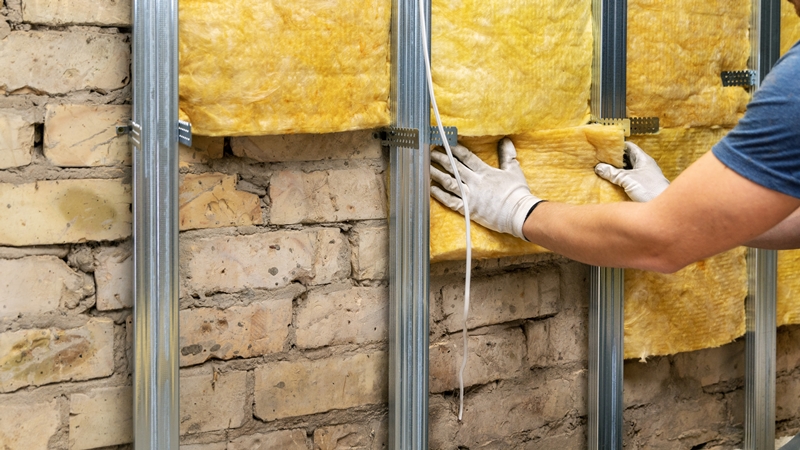
Insulated wall lining systems provide enhanced thermal and acoustic insulation while offering a smooth surface for finishing. These systems can be installed independently, creating a secondary insulated wall, or directly, with insulation placed within a framework fixed to the existing wall. Both methods significantly improve energy efficiency and comfort, making them ideal for high-spec projects.

Worker installing an insulated direct wall lining system with fiberglass insulation and metal channels on a brick wall.
A worker installs a direct wall lining system using fiberglass insulation and metal channels, improving thermal efficiency on a brick wall.
Advantages:
  • Excellent thermal and acoustic insulation
  • Enhances energy efficiency and comfort
  • Suitable for high-specification projects
Disadvantages:
  • More complex and time-consuming to install (primarily for independent systems)
  • Higher material and labour costs

Types of Plasterboard and Their Specific Uses

Dry lining encompasses a range of materials tailored to meet the diverse needs of construction projects. Each type of plasterboard offers unique properties to suit different requirements, as outlined below:

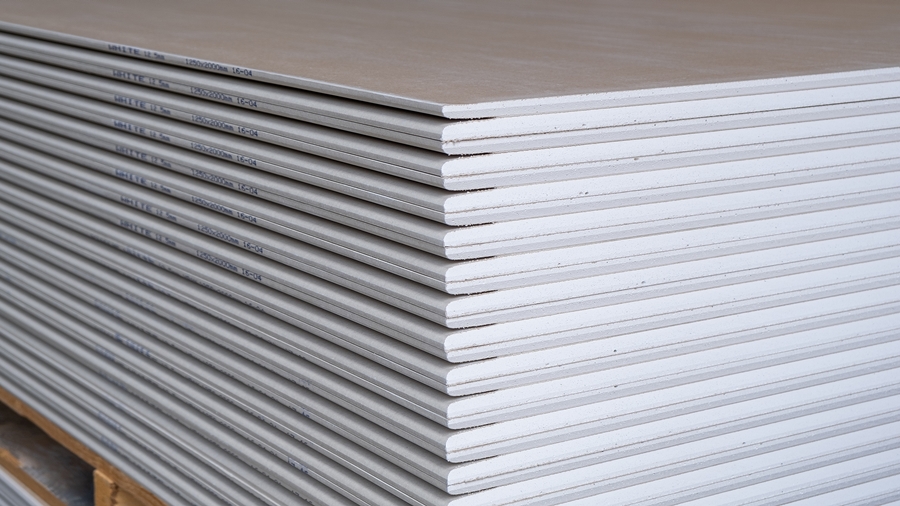
Standard Plasterboard

This is the most commonly used type of plasterboard due to its versatility and cost-effectiveness. It is suitable for most interior environments that do not require special performance features.

Stack of standard drywall plasterboards ready for installation
Standard drywall plasterboard stacked on a pallet, prepared for installation in general construction projects.
Applications:
  • Ceilings and partitions.
  • General wall linings.
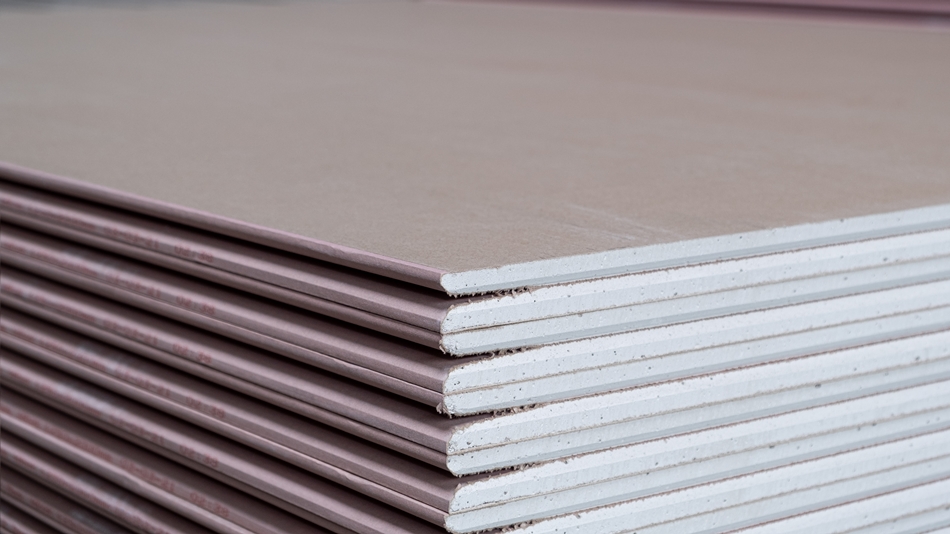
Fire-Resistant Plasterboard

Enhanced with fibreglass and other fire-retardant materials, fire-resistant plasterboard is designed to withstand high temperatures and slow the spread of flames.

Stack of fire-resistant drywall plasterboards ready for installation
Fire-resistant drywall plasterboard stacked on a pallet, suitable for installation in projects requiring enhanced fire safety and protection.
Applications:
  • Areas requiring strict fire safety, such as public buildings and commercial spaces
  • Multi-residential units
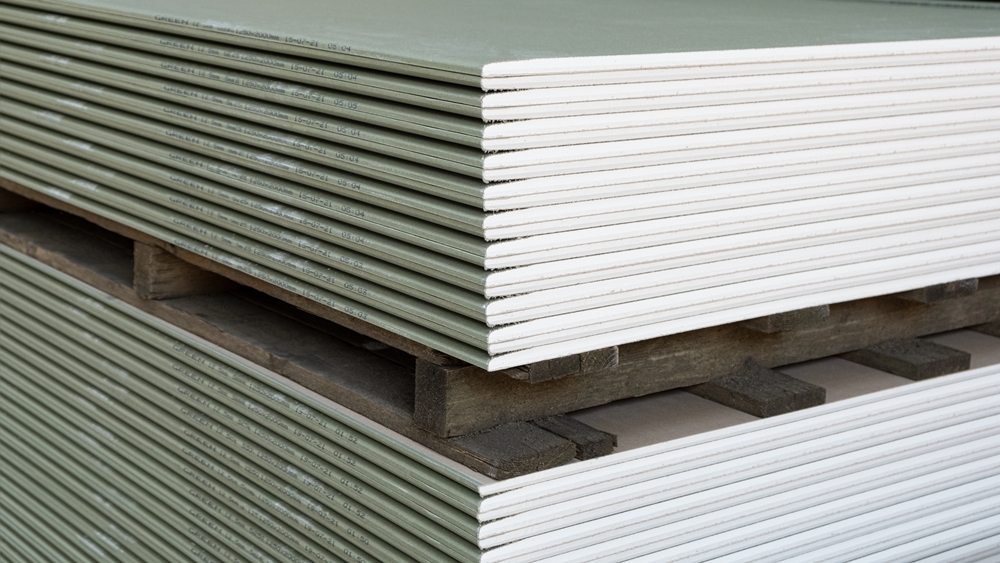
Moisture-Resistant Plasterboard

Also known as green board due to its distinctive colour, moisture-resistant plasterboard has a water-repellent core, making it suitable for use in kitchens, bathrooms, and other humid environments.

Stack of moisture-resistant drywall plasterboards ready for installation
Moisture-resistant drywall plasterboard stacked on a pallet, ideal for installation in damp environments such as kitchens, bathrooms, and basements.
Applications:
  • Kitchens, bathrooms, and other wet areas
  • Areas prone to moisture exposure
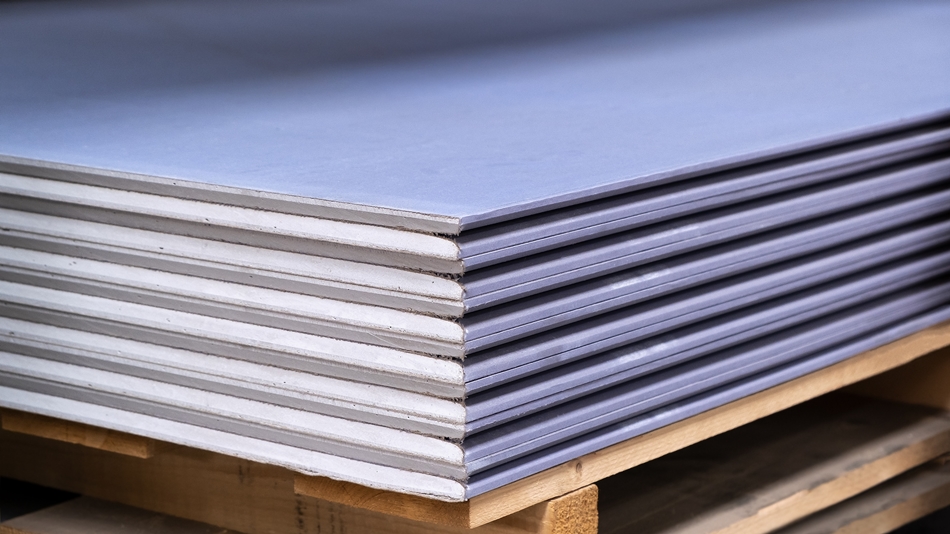
Acoustic Plasterboard

This type is denser than standard plasterboard and is designed to significantly reduce the transmission of sound between rooms or units.

Stack of acoustic drywall plasterboards ready for installation
Acoustic drywall plasterboard stacked on a pallet, ready for installation in soundproofing and insulation projects.
Applications:
  • Apartments, schools, hospitals, and offices
  • Any environment where sound insulation is crucial

Finishing Options

Now that we have explored the types of plasterboard available, let’s look at how they can be finished to create a polished, professional surface. These techniques include wet plastering and the taping and jointing method, both of which are versatile and can be applied to any type of plasterboard, depending on the specific needs of the project.

Wet Plaster

Wet plaster involves applying a layer of plaster over the entire surface of the plasterboard. This technique is ideal for achieving a smooth, seamless finish that is perfect for high-end residential or commercial projects. Any type of plasterboard, including fire-resistant, moisture-resistant, or acoustic boards, can utilise this technique to create a flawless surface that is ready for painting or wallpapering.

Taping and Jointing

The taping and jointing method involves covering the seams between plasterboard sheets with joint compound and tape. This method is particularly popular for projects where speed and cost-efficiency are key considerations. Once the compound dries, the joints are sanded smooth, creating a ready-to-decorate surface. Like wet plastering, taping and jointing can be used on any plasterboard type, making it a flexible and practical finishing option.

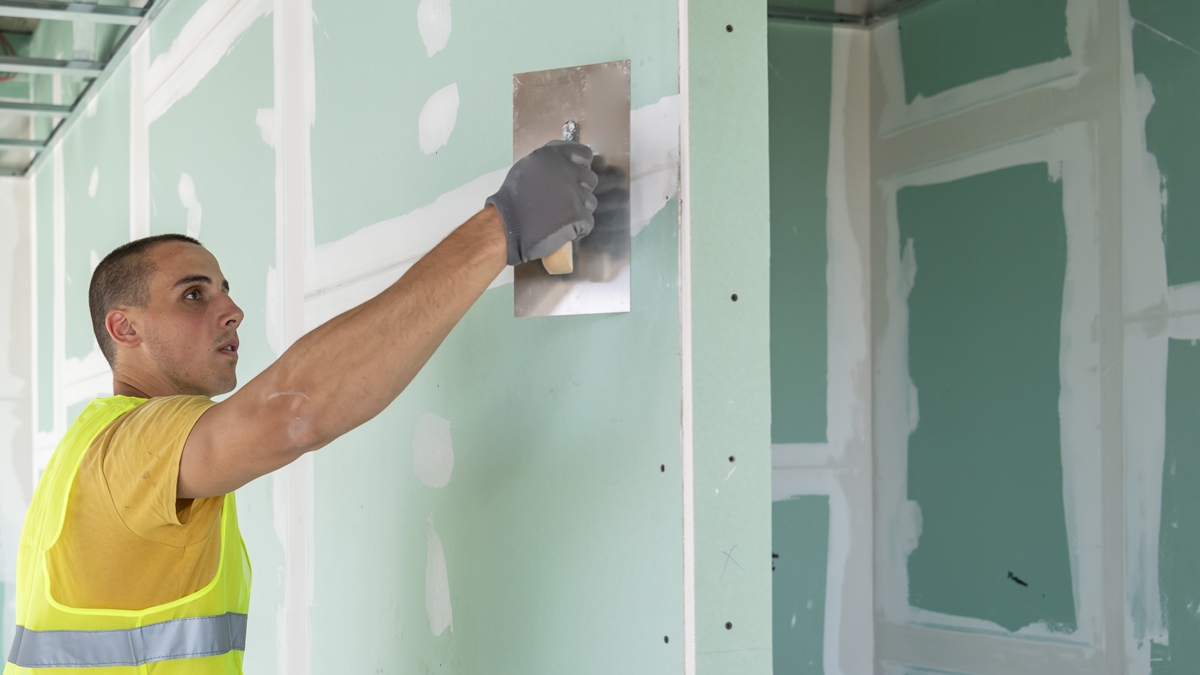
Worker applying joint tape to plasterboard drywall during construction.
A worker taping and jointing plasterboard drywall to prepare the surface for finishing during construction.

Other Essential Materials for Effective Dry Lining

In addition to plasterboard and the chosen finishing method, several other materials are crucial to the successful installation and performance of dry lining systems. Let’s explore why these materials are essential for achieving a high-quality and durable finish:

Adhesives

Used primarily in the dot-and-dab method, adhesives are essential for bonding plasterboard to walls. They must be strong enough to hold the board securely in place while allowing for minor adjustments during installation. Common types include gypsum-based and acrylic adhesives, chosen based on the wall surface material and specific project requirements.

Screws

Specialised drywall screws are used to fasten plasterboard to metal or timber frames. These screws are designed to prevent damage to the board and ensure a tight fit against the framework. Proper screw length and spacing are critical to ensuring the plasterboard is securely attached without causing damage.

Insulation Materials

Insulation is often installed together with dry lining to enhance the building’s thermal efficiency and soundproofing capabilities. Common insulation materials include fibreglass, mineral wool, and foam boards, each selected based on the specific insulation needs of the project. Fibreglass is often used in residential projects for its cost-effectiveness, while mineral wool is preferred for its fire-resistant properties in commercial buildings. Foam boards are ideal for projects requiring high thermal resistance in limited spaces.

Jointing Compounds and Tapes

These are essential for the taping and jointing method, where joints between boards are filled and smoothed using jointing compounds and tape. This process ensures a seamless finish and prepares the surface for further decoration. Choosing between ready-mix and setting-type joint compounds, as well as paper or fibreglass mesh tape, depends on factors such as drying time, strength, and ease of sanding.

Plaster for Finishing

For projects requiring a wet plaster finish, a high-quality plaster is necessary. This plaster is applied in one or more thin layers over the entire plasterboard surface to achieve a smooth, polished finish. Common types of plaster used for finishing include multi-finish and one-coat plaster, which are chosen based on the desired finish and drying time.

Plastering Beads and Angle Beads

When applying plaster, it is essential to use plastering beads or angle beads to reinforce corners and edges, ensuring a clean, sharp finish. These beads help protect vulnerable areas from damage and provide a guide for the plaster to be applied evenly.

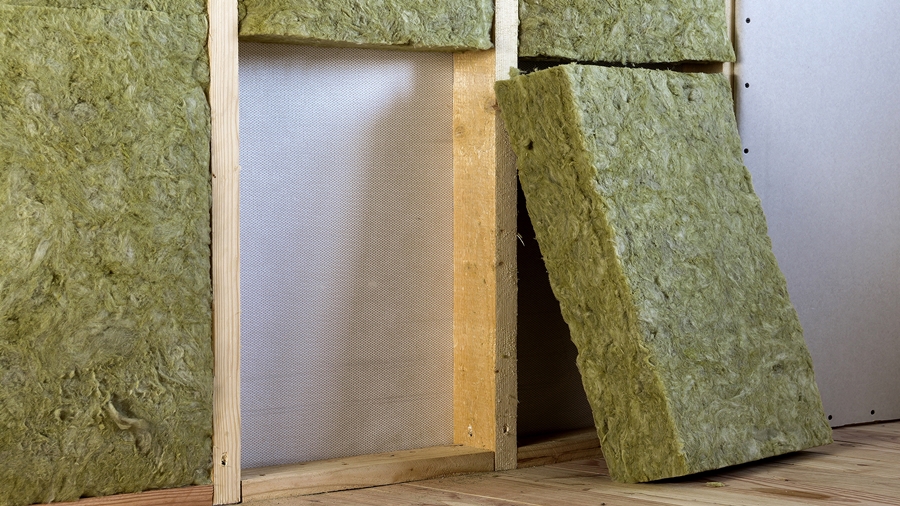
Rockwool insulation batts being installed in a wooden frame during drywall installation.
Rockwool insulation batts installed in a wooden frame, ready for drywall installation, providing thermal and acoustic insulation.

Main Tools and Equipment Needed for Dry Lining

Equipped with the necessary materials, it is also essential to have the right tools at your disposal. These tools are the backbone of an efficient and precise installation process, ensuring every step is carried out with accuracy and professionalism:

  • Measuring Tape:

This is used for accurately measuring wall dimensions and the size of plasterboard.

  • Utility Knife:

A utility knife is essential for cutting plasterboard to the required size.

  • Straight Edge/T-Square:

These tools are necessary for making precise, straight cuts on plasterboard.

  • Screw Gun or Driver:

These are used for fixing plasterboard to the framework with screws.

  • Jointing Knife:

This tool is used for applying joint compound to seams and screw holes, ensuring a smooth finish.

  • Sandpaper or Sanding Block:

These are used to smooth the joint compound after it has dried, preparing the surface for painting or finishing.

  • Spirit Level:

A spirit level ensures that the framework and plasterboard are level and plumb.

  • Pencil:

This is used for marking measurements and cutting lines on the plasterboard.

  • Mud Pan:

A mud pan holds and mixes joint compound, keeping it at hand during application.

  • Safety Gear:

Essential safety gear includes glasses, a dust mask, and gloves to protect against dust and debris during the dry lining process.

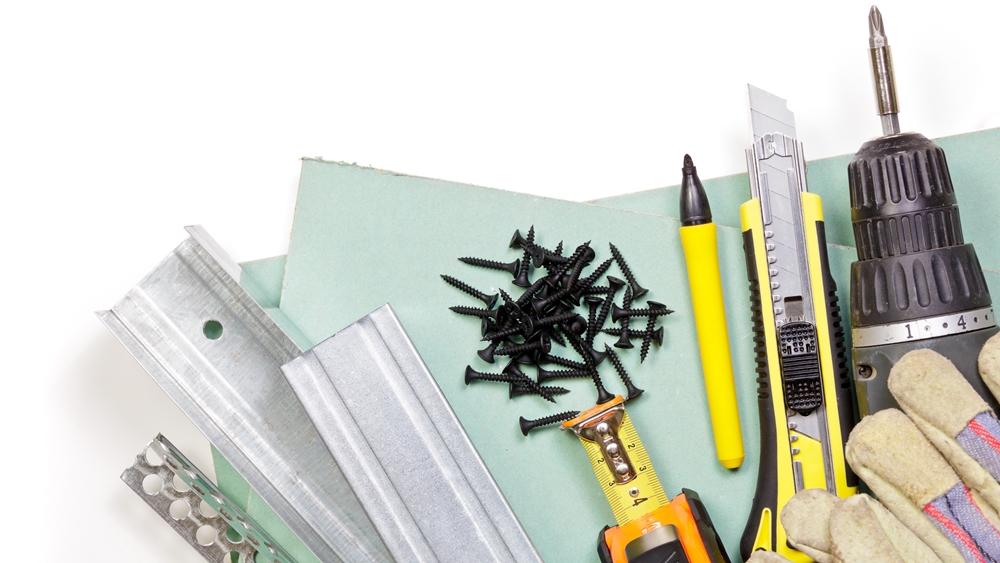
Selection of drywall installation tools including screws, metal channels, utility knives, and plasterboard.
A collection of tools used for drywall installation, including screws, metal channels, utility knives, and plasterboard.

Step-by-Step Guide to Dry Lining Installation

With the materials and tools in hand, the next step is understanding how to bring everything together. Follow this step-by-step guide to ensure a seamless and professional dry lining installation:

1. Preparation

Begin by preparing the installation area. Clean the surface thoroughly to remove dust and debris. If using the Direct Bond method, ensure the wall surface is even and dry for optimal adhesion.

2. Framework Installation (if applicable)

Construct the metal or timber framework according to your design specifications. Securely anchor the framework to the floor, ceiling, and walls. Use a spirit level to ensure everything is aligned and stable.

3. Ceiling Dry Lining (if applicable)

For ceiling installation, fix the plasterboard sheets directly to the joists or framework using drywall screws. Ensure all boards are aligned and supported during installation to avoid sagging.

4. Insulation Installation

Install insulation materials within the framework. Cut the insulation to fit snugly between the studs, joists, or ceiling battens, ensuring there are no gaps. This step enhances the thermal and acoustic performance of the structure.

5. Measuring and Cutting

Measure the area to be covered and cut the plasterboard to size using a straightedge and utility knife. Accurate cuts are crucial for a tight fit and smooth finish.

6. Applying Adhesive (Direct Bond)

If using the Dot and Dab method, apply adhesive dabs directly to the wall, spacing them about 30 cm apart. This ensures even coverage and a secure attachment for the plasterboard.

7. Fixing the Plasterboard

Position the plasterboard against the wall, framework, or ceiling joists. For framed methods, secure the board with screws, ensuring they are evenly spaced. In the Direct Bond method, press the board firmly until it adheres securely.

8. Taping and Jointing

Apply tape to the joints between plasterboard sheets. Cover the tape with joint compound, smoothing it out with a jointing knife. Once dry, sand the joints to create a smooth surface, ready for decoration.

9. Applying Wet Plaster (Optional Finish)

For a premium finish, apply one or more coats of wet plaster over the entire plasterboard surface. Smooth it out with a trowel, ensuring a flawless finish before painting or wallpapering.

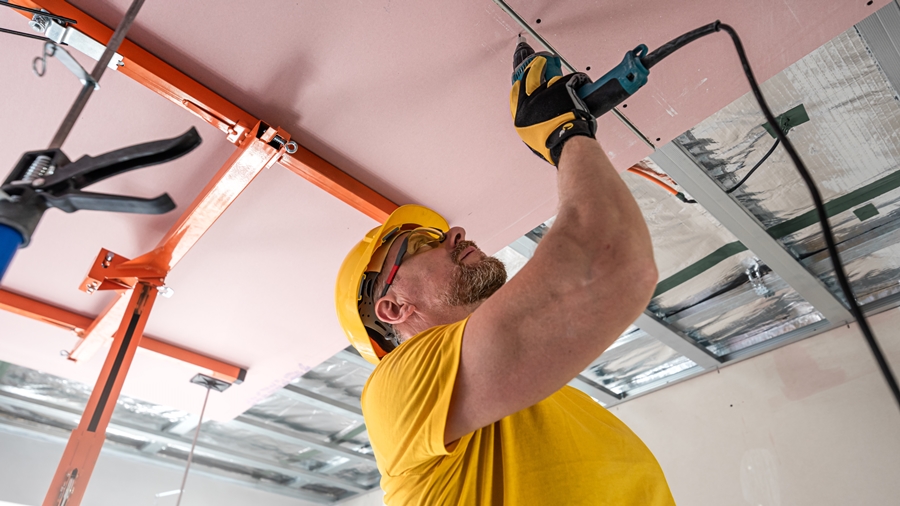
Worker installing drywall on a ceiling using power tools and support equipment.
A worker installing drywall on a ceiling, using power tools and ceiling support equipment during construction.

Future Trends in Dry Lining

As construction practices continue to evolve, dry lining is expected to see further advancements and innovations. These developments reflect the growing focus on sustainability, efficiency, and integration with modern building systems. Key trends shaping the future of dry lining include:

  • Sustainable Materials:

The construction industry is increasingly focusing on sustainability, and dry lining is no exception. The development and use of eco-friendly plasterboard and insulation materials are expected to grow, reducing the environmental impact of construction projects.

  • Advanced Insulation Technologies:

Improvements in insulation materials and technologies will continue to enhance the thermal and acoustic performance of dry lining systems. This will contribute to more energy-efficient and comfortable buildings.

  • Integration with Smart Building Systems:

The integration of dry lining with smart building systems, such as embedded sensors and automated controls, will offer new possibilities for building management and maintenance. This can lead to more responsive and efficient buildings.

  • Enhanced Fire and Moisture Resistance:

Ongoing research and development in fire-resistant and moisture-resistant materials will further improve the safety and durability of dry lining installations. This will expand the range of applications and environments where dry lining can be used.

Conclusion

Dry lining has become a cornerstone of modern construction due to its speed, flexibility, and ability to meet specialised building needs, such as fire resistance, soundproofing, and moisture protection. As trends shift towards sustainability and smart building technologies, dry lining will continue to evolve with eco-friendly materials and integrated systems that enhance energy efficiency and building performance.

Choose Northfield Contracts Ltd. for Your Dry Lining Needs

At Northfield Contracts Ltd., we provide professional dry lining services in Berwick-upon-Tweed, North Northumberland, and the Scottish Borders. Whether for new builds, renovations, or commercial interiors, our skilled team ensures smooth, high-quality finishes tailored to your project’s requirements. From premium material selection to expert installation, we deliver durable and functional solutions designed to enhance your space, exceed expectations, and ensure customer satisfaction.

Contact us today for all of your dry lining requirements!

CONTACT US
Northfield Contracts Ltd. is your number one choice for dry lining services in Berwick-upon-Tweed, North Northumberland, and the Scottish Borders.

Share this post.

Stay informed.

Your data will be stored and processed in accordance with our Privacy Policy.

Latest Blogs

Receive a free, no-obligation quote

Looking for dry lining services in Berwick-upon-Tweed, North Northumberland, and the Scottish Borders? Complete our Quick Quote form today for a free, no-obligation quote, and we’ll respond promptly with all the information you need.